How To Convert Figma To WordPress Effortlessly (3 Methods)
The combination of Figma and WordPress offers a powerful solution for designing and developing websites. Figma, renowned for its design capabilities, seamlessly integrates with WordPress, a user-friendly platform for website creation. While Figma excels in crafting intricate designs, WordPress methods to convert these designs into fully functional websites. This partnership leverages the strengths of both tools, ensuring a smooth transition from concept to reality.
In this blog, we will discuss the top 3 easy methods for converting Figma to WordPress, providing you with the ultimate Figma to WordPress tutorial.
How to convert Figma to WordPress
Converting Figma design to WordPress is about turning visual concepts into functional web pages. This can be done through various methods, such as the HTML process, pre-made themes, and page builders. If you’re looking for a tailored solution built to your exact specifications, Custom WordPress Development is worth exploring before deciding on an approach. Each method has its benefits, so it’s important to pick the one that aligns with your project’s needs and expertise level. The right approach can streamline development, getting you from concept to completion quicker.
Discover the top 3 methods to bridge the Figma to WordPress gap:
- Using the HTML Process: For greater control and customization, converting Figma design to HTML/CSS and integrating them into WordPress is the best option. This method provides flexibility but requires coding skills to create personalized templates.
- Using a Premade Theme: This method offers convenience for those without extensive coding expertise, making website creation more accessible. However, customization options may be limited compared to manually coding templates.
- Using Elementor: Page builders simplify website design by offering drag-and-drop functionality and pre-designed elements. Elementor is one of the user-friendly page builders, allowing for quick and easy customization without extensive coding knowledge. However, complex customizations may require additional plugins or coding skills.
Before diving into the conversion process, it’s essential to have a clear understanding of the steps involved. The Figma to WordPress conversion process consists of several stages, each requiring careful attention to detail. Let’s take a closer look at these stages to ensure a seamless transition from design to development.
Understanding the Figma to WordPress Conversion Process
The first step of conversion process is to prepare your Figma designs for WordPress integration. This involves organizing your design files, optimizing images, and ensuring that your design components are easily transferable to WordPress. By structuring your Figma design effectively, you can save time during the conversion process and minimize any potential issues that may arise.
Figma provides a range of export options and settings to ensure that designers can obtain high-quality assets suitable for their intended use. Exporting assets manually from Figma can be a time-consuming task, particularly when dealing with complex projects that are distributed across multiple systems. After selecting the specific layers, you can export your assets.

Individually exporting each element would consume considerable time. Selecting elements, adjusting scale, and choosing image formats becomes tedious when dealing with numerous assets.

To export multiple layers, manual selection is necessary. After selecting the layers the export button shows the number of layers that will be exported.

HTML Process to Convert Figma Design to WordPress
Traditional yet reliable, the HTML process involves manually coding the Figma design into HTML and CSS, which is then integrated into WordPress. While this method requires coding proficiency, it offers full control over the design’s implementation and allows for precise customization. Developers with HTML, CSS, and WordPress knowledge can harness this method to achieve pixel-perfect results.
1.1 Login to Figma
- Log in to Figma and go to Bootstrap.com to get the HTML starter template.
- Start designing your layout.
Now you can convert your HTML designs into a WordPress theme.
1.2 Create your Development Space
To safely work on your WordPress theme without affecting your live site, set up a local development environment such as XAMPP or MAMP on your computer. This lets you run WordPress locally and make changes securely.
1.3 Create a new Theme Folder
Go to the “wp-content/themes” folder in your WordPress setup to start. Please make a new folder for your theme and give it a fitting name, preferably related to your design.

1.4 Create Essential Theme Files
Inside the newly created theme folder, establish the following crucial files:
- style.css: This file encompasses the theme’s metadata, encompassing details like the theme name, author, version, and more. Begin with a basic template and modify the information accordingly.
- header.php: Containing the HTML code for the header section of your theme, this file is integral to the structure.
- footer.php: Comprising the HTML code for the footer section of your theme, this file is essential for a cohesive design.
- functions.php: This file contains reusable PHP functions that are used across multiple pages of your website. These functions could perform tasks like sanitizing input, formatting data, or interacting with the database.
- index.php: Acting as the default template, this file is responsible for presenting the homepage of your theme.
- page.php: This is a template file used to display individual static pages on a website. It’s the default template that WordPress uses to render individual pages unless a more specific template is available.
- 404.php: This file is used to display a custom 404 error page when a requested URL is not found on your website. It provides a better user experience than the default browser error page.
1.5 Breaking down your HTML Design
Look at your HTML design and split it into smaller parts, like headers, footers, sidebars, and content sections.
Find parts that repeat, like the header, and put each in its own PHP file in your theme folder. For instance, if you have a header in your design, make a file named “header.php” and move the header’s HTML code there.
1.6 Convert HTML to PHP
To make your website dynamic in WordPress, convert your HTML files to PHP. Use WordPress template tags and functions instead of fixed content. For example, replace static text with to show the site name dynamically.
1.7 Using WordPress Template Tags and Functions
To display content dynamically, add WordPress template tags and functions to your PHP files. For example, you can use the_title() to show post/page titles or the_content() to display the main content.
1.8 Include Custom CSS and JavaScript files
Add custom CSS stylesheets or JavaScript files to your theme folder if your design needs them. Use WordPress functions like wp_enqueue_style() and wp_enqueue_script() in files like “functions.php” or “header.php” to include them correctly.
1.9 Incorporating WordPress Features
To add dynamic features like blog posts, comments, or menus from your HTML design, use WordPress functions, hooks, and plugins. This helps seamlessly integrate these features into your theme.
1.10 Testing and Uploading Your Theme
- Testing Your Theme: After adding all features, thoroughly test your theme. Check elements, styles, and functions to ensure they work correctly. Test on different devices and browsers to confirm responsiveness
- Uploading Your Theme: Once satisfied, compress the theme folder into a ZIP file. Upload it to your live WordPress site. In the WordPress dashboard, go to Appearance > Themes, then activate your new theme.
Note: Creating a WordPress theme from HTML requires knowledge of HTML, CSS, PHP, and WordPress. If you’re unsure, consider hiring experienced WordPress developers.
Pros:
- Complete Design Control: You have full creative freedom to execute your exact vision without constraints imposed by third-party plugins or themes.
- Optimized Performance: Manual coding often results in cleaner code, potentially leading to faster loading times and a more responsive website.
- Enhanced Learning Opportunity: The process itself offers a valuable learning experience for those seeking to deepen their understanding of web development principles and WordPress theme creation.
- Custom Functionalities: You can seamlessly incorporate custom features or integrations that may not be readily available in pre-built themes.
Cons:
- Technical Expertise Required: A strong foundation in HTML, CSS, PHP, and WordPress development is essential to successfully implement this method.
- Time Commitment: Manual coding demands a significant investment of time, particularly for those less familiar with the technologies.
- Potential for Errors: The manual nature of the process increases the likelihood of coding errors, which could affect website functionality if not identified and corrected.
Figma Design to WordPress by Premade Theme
This method is simpler in usability compared to the HTML approach. Instead of constructing a WordPress theme from scratch, you can purchase a pre-made WordPress theme and customize it to meet your needs. Pre-made themes provide a ready-made framework for designers seeking a quicker solution that aligns with Figma’s design elements. These themes often come with built-in templates and styling options, making the conversion process straightforward. By selecting a theme that closely matches the Figma design, designers can achieve a cohesive look with minimal customization effort.
Follow these steps to directly transform a Figma design into WordPress using an existing WordPress theme, making sure it is mobile-friendly.
2.1 Select an appropriate WordPress Theme
Choose a suitable WordPress theme by exploring options that closely match the design and structure of your Figma design. Find these themes on various platforms such as Sea Theme, Theme Forest, Elegant Themes, or the official theme repository on WordPress.org, making sure they have a responsive design.

2.2 Setup a WordPress Installation
Install WordPress on your web hosting server. Many web hosting services offer one-click installations for WordPress, or you can choose a manual installation by downloading WordPress from WordPress.org and following the provided installation guidelines.
2.3 Install and Activate the selected Theme
After setting up WordPress, go to your WordPress dashboard, click on Appearance > Themes, and choose the “Add New” option. Upload the theme selected in the previous step and activate it.

2.4 Customize the Theme and Design
Most pre-made WordPress themes offer customization features that you can access through the WordPress Customizer or theme options panel. Use these settings to align design elements, colors, fonts, and layout with your Figma design.
This process may involve tasks such as uploading custom logos/images, configuring menus, refining typography, and adjusting various visual settings, contributing to the effective development of your website.
2.5 Create Essential WordPress Templates
Depending on the complexity of your Figma design, you may need to create custom WordPress templates to replicate specific layouts or page types. This stage requires proficiency in WordPress theme development and PHP.
You can create custom templates by duplicating and modifying existing theme files or by using a child theme to extend the theme’s functionality, ensuring better alignment with web design specifications.
2.6 Convert Design Elements to WordPress
Start converting your Figma design to WordPress by recreating the design elements using WordPress’s built-in CMS. This involves creating pages, posts, and customized post types and incorporating content such as text, images, videos, and other media.
Use the Gutenberg block editor or page builder plugins like Elementor or Divi to create layouts.
2.7 Interactive and Dynamic Features
If your Figma design includes interactive components like forms, sliders, galleries, or any dynamic functionalities, you need to integrate the features by incorporating suitable WordPress plugins. Explore the WordPress plugin repository or premium plugin options to find the appropriate plugins for implementing these functionalities.
2.8 Optimize Performance and Responsiveness
Ensure your WordPress site is optimized for smooth performance across different devices and screen sizes. Improve loading times and display accuracy by optimizing images, minifying CSS and JavaScript files, enabling caching, and incorporating responsive design techniques.
2.9 Test and Launch your WordPress site
Thoroughly test your website across various browsers, devices, and operating systems to confirm its alignment with your Figma design. Make any necessary adjustments and enhancements based on user feedback and testing outcomes.
Once satisfied with the conversion, launch your WordPress website onto your active server or hosting environment.
Pros:
- Simplified Setup: Requires less technical expertise and is generally quicker to set up compared to manual coding.
- Wide Theme Variety: Abundant choices of themes, offering diverse styles and functionalities to suit various design preferences.
- Built-in Features: Many themes include pre-built features, saving time and effort in implementing common website elements.
- Ongoing Updates: Theme developers often release updates for bug fixes, security patches, and new features, ensuring website maintenance.
- Customization Options: Most themes provide customization settings to personalize the design within a certain range.
Cons:
- Design Constraints: Limited to the design structure and features offered by the chosen theme, potentially restricting creative freedom.
- Bloated Code: Some themes may contain unnecessary code, potentially affecting website performance.
- Compatibility Issues: Updates to themes could introduce compatibility issues, requiring troubleshooting.
- Recurring Costs: Premium themes often involve ongoing subscription fees for updates and support.
- Potential Constraints: Certain themes might limit customization options, hindering complete alignment with the Figma design.
Read More: Keep exploring with our article on PSD TO WORDPRESS CONVERSION for more insights!
Convert Figma to WordPress Elementor
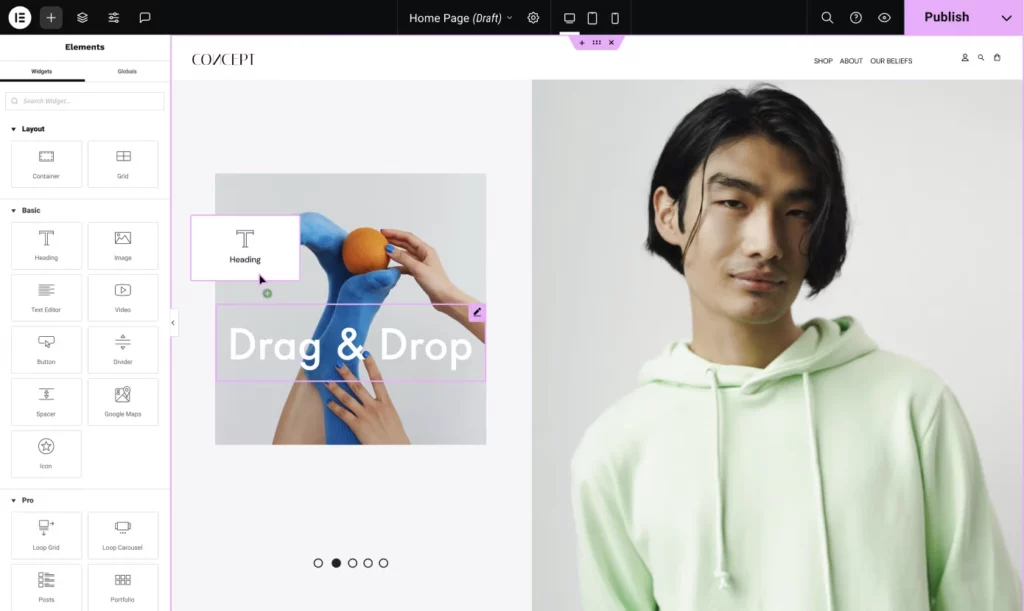
Page builders have revolutionized website development by empowering users to create complex layouts without coding knowledge. When converting a Figma design to WordPress, Elementor offers intuitive drag-and-drop interfaces, allowing designers to recreate their designs visually. This method appeals to those who prefer a visual approach to web design and value flexibility in customization. Using a page builder like Elementor represents the simplest way to convert your Figma design into WordPress.
Ensure the completion and finalization of your Figma design by incorporating all necessary layouts, elements, and assets.
3.1 Set up WordPress and Install the Plugin
Install WordPress on your web server or choose a local development environment such as XAMPP or WAMP. After that install and activate the Elementor plugin from the WordPress repository.
3.2 Create a new Page, and open the Elementor Editor
In the WordPress admin panel, navigate to “Pages” and create a new page or template for your Figma design. On the page edit screen, click the “Edit with Elementor” button to open the Elementor editor.
3.3 Import Figma Design into Elementor
There are several options to import your Figma design. you can either choose a Figma to HTML conversion service or tool to generate HTML/CSS code and then copy and paste the code into an Elementor section or widget.
3.4 Customize the Design
Once you’ve imported your Figma design into Elementor, you can refine it using Elementor’s extensive styling and layout tools. Personalize the design to your liking by modifying colors, fonts, spacing, and other visual elements to closely match your original Figma design.
3.5 Incorporate Dynamic Content and Features
Use Elementor’s widgets and integrations to incorporate dynamic content and functionality into your design. Integrate elements such as contact forms, sliders, galleries, or any other interactive features essential to your design.
3.6 Preview and Test
Use Elementor’s preview feature to observe how your design appears across various device viewports, including desktop, tablet, and mobile. Thoroughly test interactivity, responsiveness, and overall functionality to ensure it aligns with your requirements.
3.7 Save and Publish
After finalizing your design in Elementor, save your modifications and proceed to publish the page or template. This action will ensure that your updated design is live and accessible on your WordPress site for your audience to view and interact with.
Pros:
- Visual Interface: The drag-and-drop interface enables design creation and editing without requiring coding knowledge, making it accessible to users of all technical levels.
- Faster Development: Page builders often accelerate the development process, allowing for quicker website creation and updates.
- Live Preview: Elementor offers real-time previews of changes, enabling you to visualize the design as you build it.
- Extensive Widgets and Templates: A wide range of pre-built widgets and templates streamline the addition of common design elements and page structures.
- Dynamic Content Integration: Integrate dynamic content features such as forms, sliders, and galleries with ease.
Cons:
- Plugin Dependency: Reliance on a third-party plugin adds an extra layer of complexity and potential compatibility issues.
- Potential Performance Impact: Page builders can sometimes introduce additional code that might affect website performance, especially if not optimized carefully.
- Limited Customization: While offering customization options, complete control over every aspect of the design might not always be possible.
Here are some additional things to keep in mind
- There are several plugins available that can help you convert Figma designs to WordPress themes. These plugins can save you time and effort, but still, they’re not perfect.
- It’s important to test your website thoroughly before you launch it. This will help you ensure that your Figma designs have been translated correctly to WordPress
- If you’re not comfortable with coding or using WordPress, consider getting help from a developer to bring your Figma designs to WordPress.
Conclusion
Converting Figma design to WordPress opens a realm of possibilities for designers and developers alike. Whether through page builders, pre-made themes, or manual coding, each method offers unique advantages and challenges. Page builders like Elementor provide a visual interface for seamless design integration while Pre-made themes offer quick setups with built-in features, although they may limit customization to a certain extent. On the other hand, The HTML process gives you complete control over your design implementation with coding knowledge.
The key lies in choosing the right approach based on project requirements, technical expertise, and design objectives. By harnessing the right tools and techniques, designers can bring their visions to life, captivating audiences and delivering impactful digital experiences. Testing and refinement are crucial steps to ensure a responsive, functional, and visually captivating WordPress website.
Leave a Reply
Articles
Related Insights.
Blogs and Resources on WordPress, WooCommerce, SEO and Marketing

Leave a
Comment.