Countdown
Contents
Post Grid Layouts
Post Filter
- Hide Main Title Selection
- Hide Link
- Link Title
- Post Type Selection
- Taxonomy Selection
- Multiple Term Selection
- Background Color
- Choose Background Image
- Padding & Margin
- Heading Settings
- Excerpt Settings
- Author & Date Settings
- Active Term Styling
- Regular Term Styling
- Post Styling
- Hover Effect
- Actions
- Advanced
Post Ticker
Slider
URL Snippet
Parallax
Midnay Patterns
The Countdown Block lets you create stylish, fully customizable timers for events, promotions, and deadlines. Choose from five layout styles—including Flip Clock, Grid, and Circular—and customize every visual detail, from typography to colors and spacing. Set precise target times, toggle time units, and define custom labels. Enhance engagement with animation effects and scroll-triggered reveals. Post-expiry options include custom messages or auto-hiding the timer. Fully responsive and ideal for launches, sales, and limited-time offers.
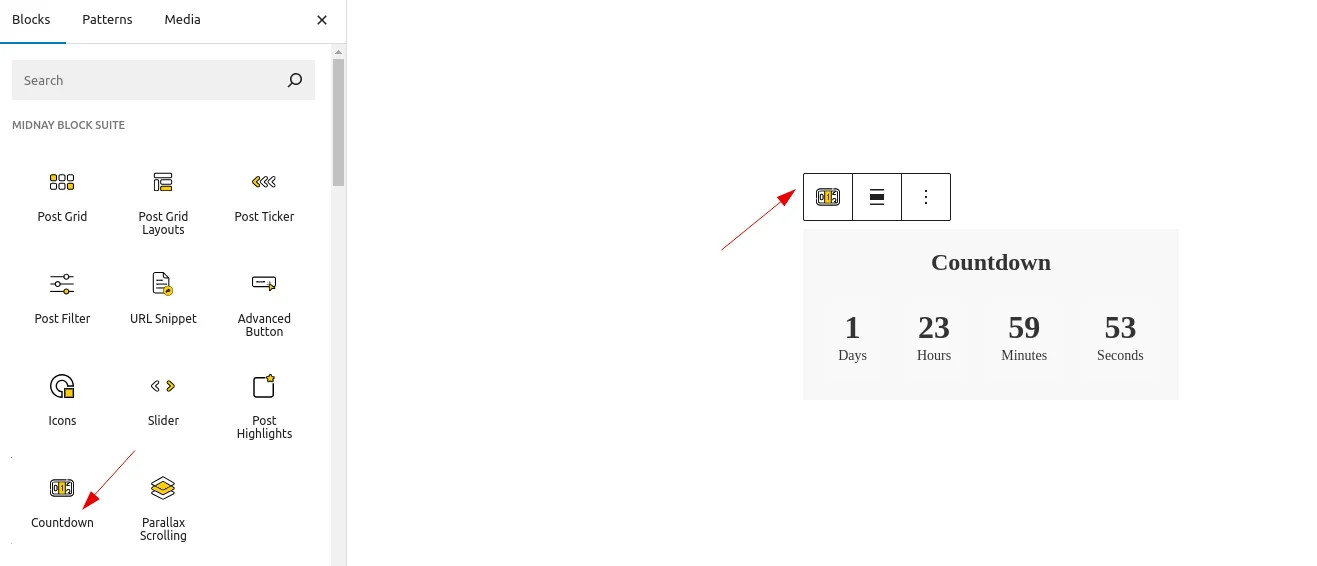
Step 1:
Add Coundown block on edit page.
Step 2:
By default, the current date will be selected.

So the timer will expire, and the text will then be displayed on the backend.

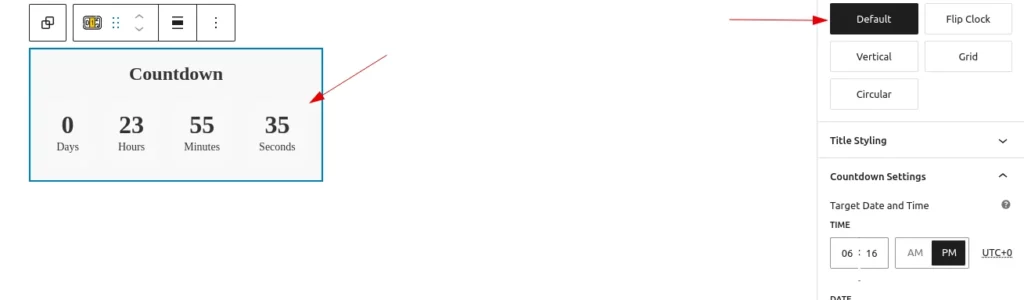
Step 3:
Styles
User can choose which layout the countdown should display
Step 4:
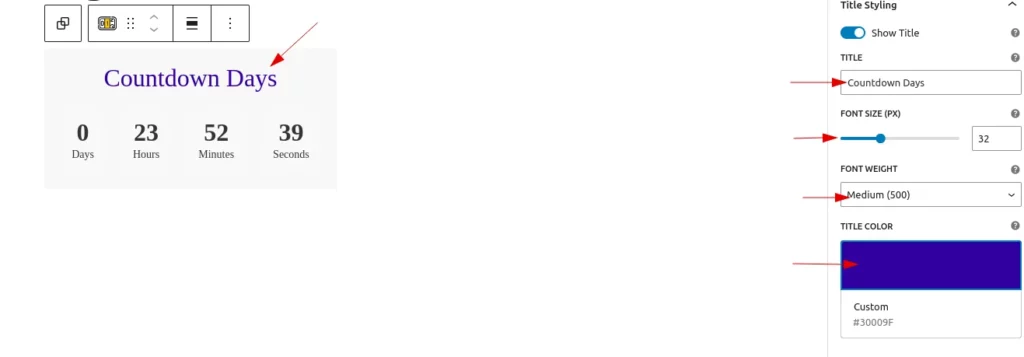
Title Styling
Customize the appearance of your countdown title. This panel allows you to show or hide the title, set custom text, adjust font size, weight, and color, and apply text transformations. You can also fine-tune spacing with letter spacing and margin bottom controls. Use the Reset Title Styling button to revert to default styles at any time.
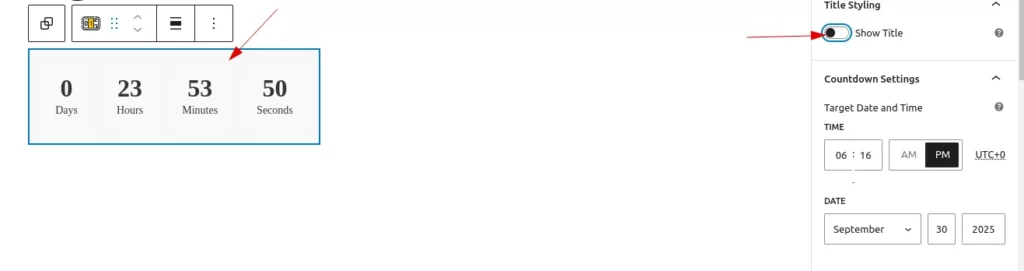
Show Title
When the ‘Show Title’ toggle is disabled, both the block title and its customization options will be hidden.
Title
Users can customize the block title by setting the name, selecting a font size (ranging from 12px to 72px), choosing a font weight (normal, bold, light (300), medium (500), semi-bold (600), or extra bold (800)), and changing the title color.
Users can customize the block title by setting text transformation (uppercase, lowercase, or capitalize), adjusting letter spacing (in pixels), and adding bottom margin (default is 20px).
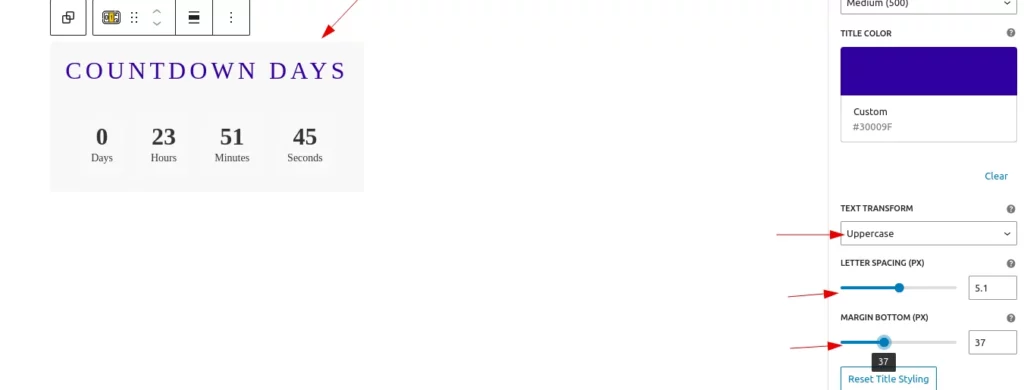
Reset Title Styling
Users can easily reset all title styling to its default state by clicking this single button.
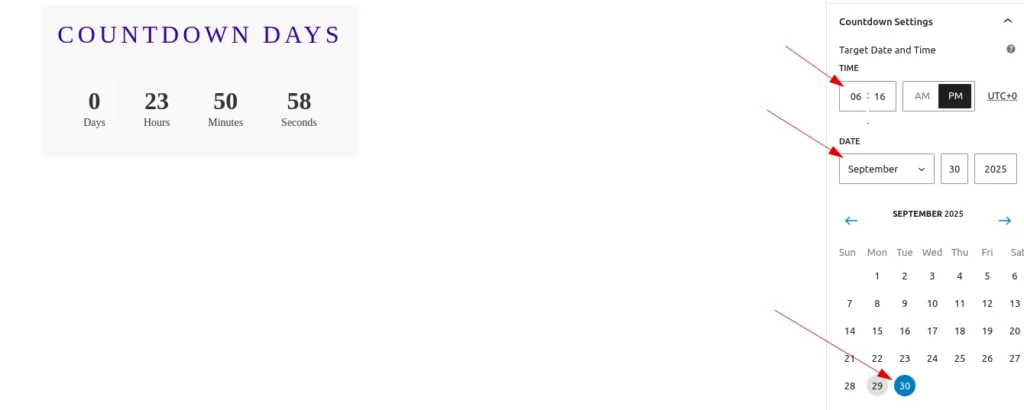
Step 5:
Countdown Settings
Users can easily set the block’s date and time using this setting.
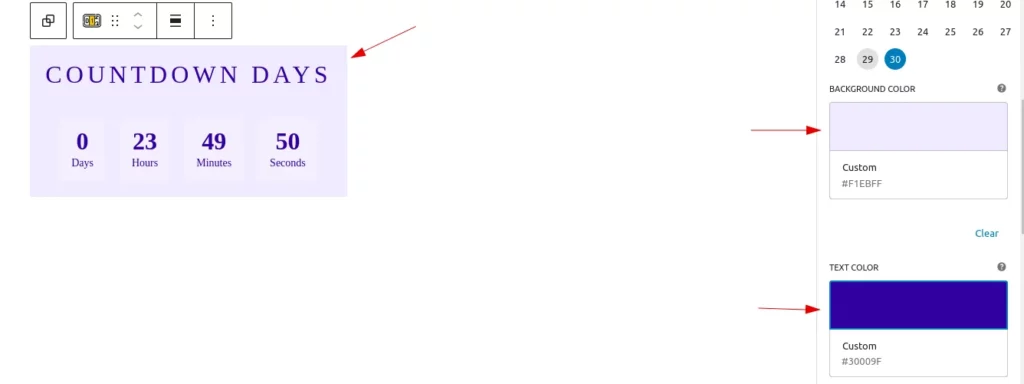
Background Color And Text Color
Users can easily set the background color and the text color of a block with a single setting.
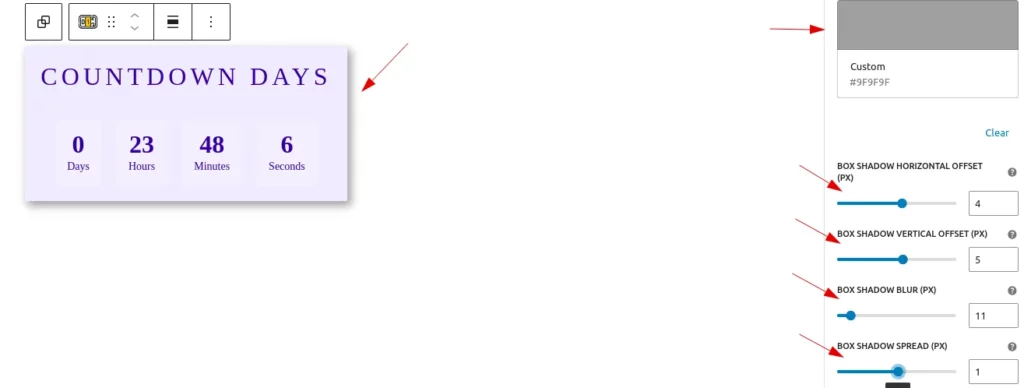
Box Shadow
Users can easily customize the box shadow of your countdown block with the following controls:
- Box Shadow Color – Choose a color for the shadow.
- Horizontal Offset – Adjust how far the shadow shifts left or right.
- Vertical Offset – Adjust how far the shadow shifts up or down.
- Blur – Control the softness of the shadow edges.
- Spread – Expand or shrink the shadow size.
Each setting includes a helpful tooltip explaining its purpose.
Toggle To Show Units And Label Customization
Users can easily choose which time units to display using this toggle button. By default, all units—days, hours, minutes, and seconds—are shown.Additionally, users can customize each unit’s label by editing the corresponding fields.
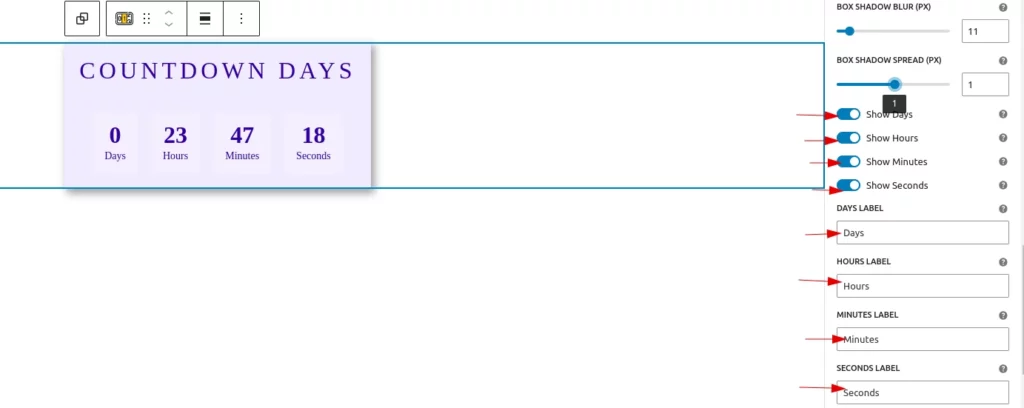
Reset Countdown Settings
Users can easily reset all countdown settings to their default state by simply clicking this button.

Step 6 :
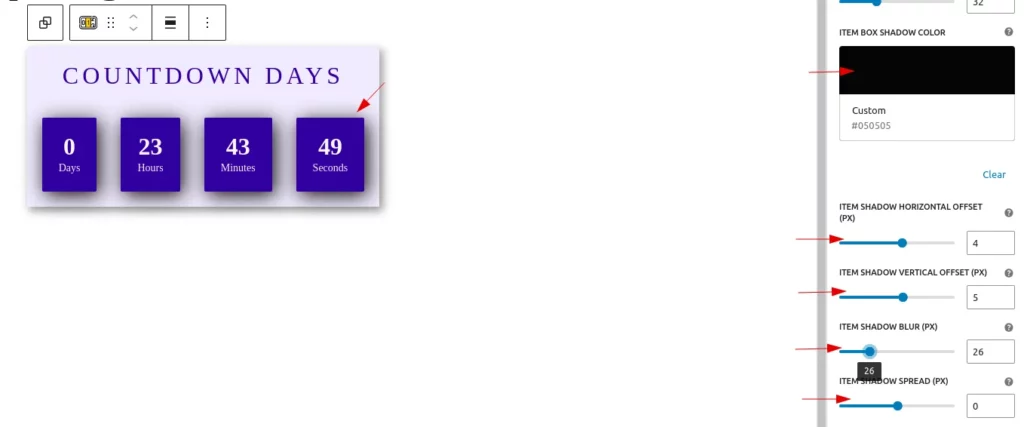
Countdown Item Styling
Users can easily customize each countdown unit individually using this setting.
Easily customize the appearance of each countdown item:
- Background Color – Select a background color for the item.
- Border Radius – Round the corners of the item.
- Padding – Adjust the space inside each item.
- Gap Between Items – Set the spacing between individual countdown items.

Box Shadow For Items
Users can easily apply box shadow settings to the items within the countdown block.
Reset Countdown Item Styling
Users can easily reset all countdown item styling to their default state by simply clicking this button.
Step 7:
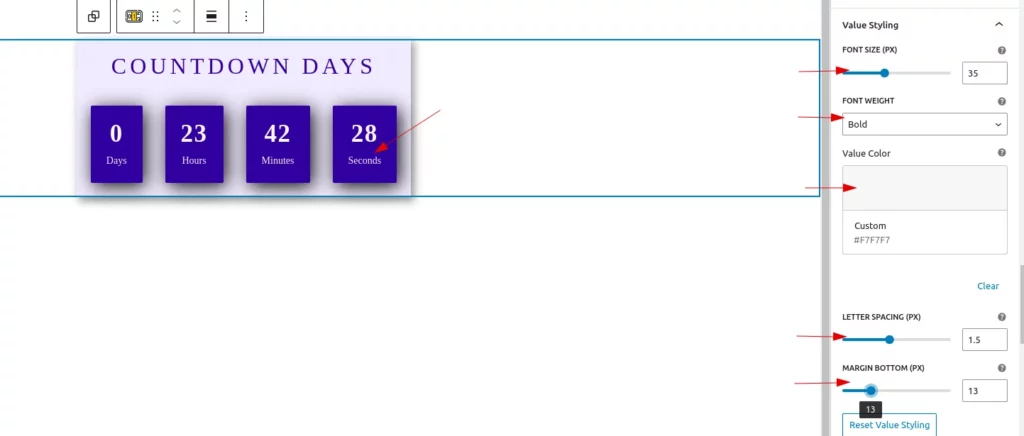
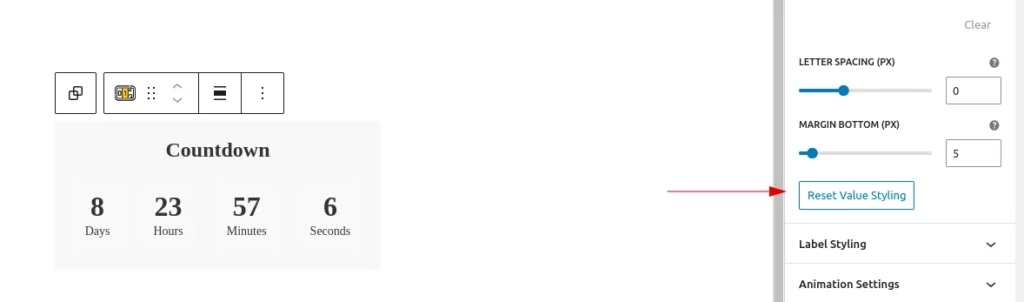
Value Styling
Fine-tune the appearance of the countdown values with the following options:
- Font Size – Adjust the size of the value text.
- Font Weight – Choose from various font weights, including normal, bold, and custom weights.
- Value Color – Set the text color for the countdown value.
- Letter Spacing – Control the spacing between characters.
- Margin Bottom – Add space below the value text for better layout control.
Tooltips are provided for each option to help guide your customization.
Reset Value Styling
Users can easily reset all value styling to its default state by clicking this single button.
Step 8 :
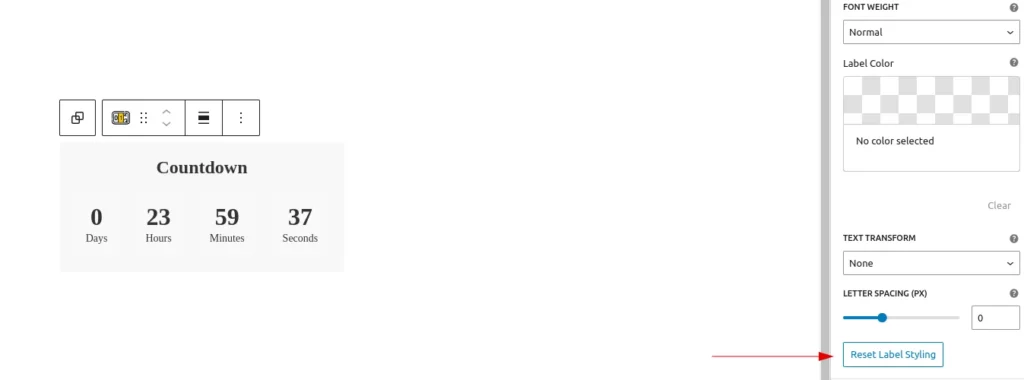
Label Styling
Customize the look of the countdown labels with the following options:
- Font Size – Set the label text size.
- Font Weight – Choose from light to bold font weights.
- Label Color – Pick a color for the label text.
- Text Transform – Control text casing (e.g., uppercase, lowercase).
- Letter Spacing – Adjust the spacing between label characters.
Each setting includes tooltips for added guidance.

Reset Label Styling
Users can easily reset all label styling to its default state by clicking this single button.
Step 9:
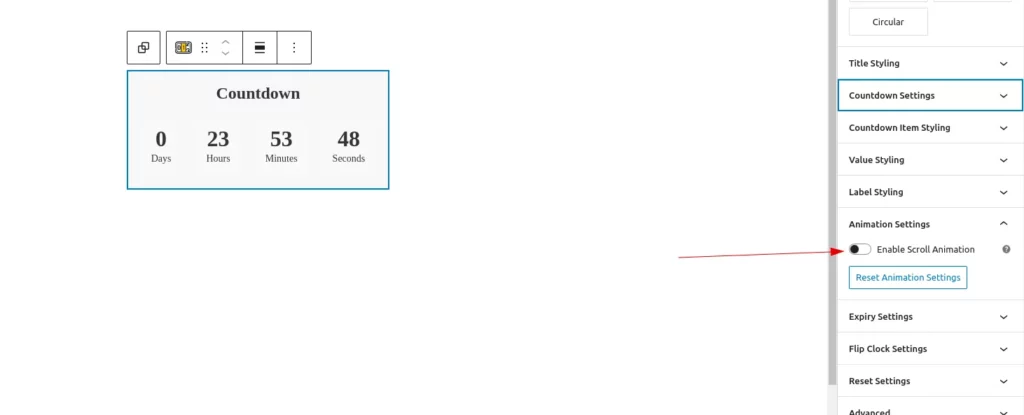
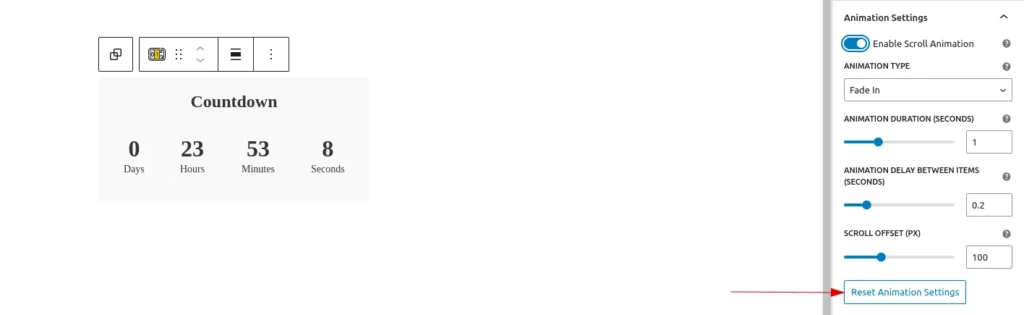
Animation Settings
Enable scroll-triggered animations for countdown items. Choose animation type, duration, delay, and scroll offset for smooth entrance effects.
Enable Scroll Animation
Enable this toggle button for adding animation to the countdown block.
Animation
Add engaging animations to your countdown block as they appear on scroll:
- Enable Scroll Animation – Toggle to activate animations.
- Animation Type – Choose from effects like Fade In, Slide, Zoom, or Flip.
- Animation Duration – Set how long the animation lasts.
- Delay Between Items – Control the staggered delay between each item’s animation.
- Scroll Offset – Define when the animation triggers based on scroll position.
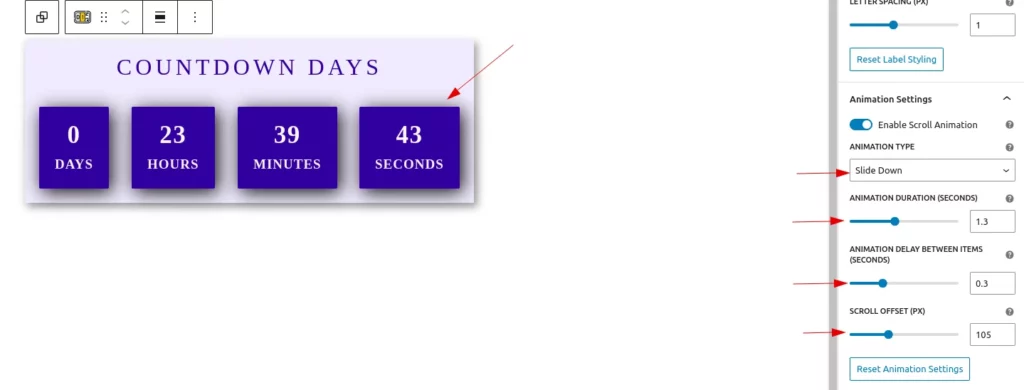
Reset Animation Settings
Users can easily reset all animation settings to its default state by clicking this single button.
Step 10:
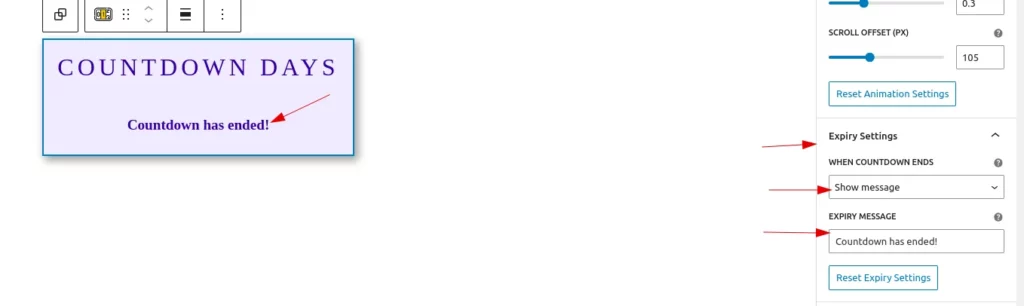
Expiry Settings
Control the behavior of the countdown after it ends. Users can choose to either hide the timer completely or display a custom expiry message to inform viewers that the countdown has finished. A reset button is also provided to restore these settings to their default state.
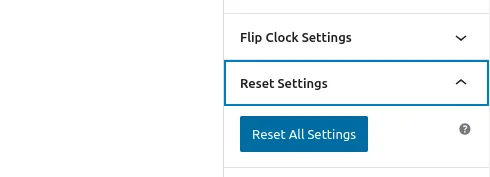
Step 11:
Reset Settings
Users can reset all the countdown block settings by clicking the reset button.